I was chatting with a fellow photographer friend the other day about their editing workflow, and I was shocked to hear that they have been converting each of their PSD files to JPGS manually!! Yes, as in opening each and every PSD individually and saving them to a JPEG folder.
Let me tell you, there’s a better way! Needless to say their mind was blown when I introduced them to the great and almighty Image Processor tool within Photoshop! Today, I thought I’d share ins and outs of the Image Processor tool with you just in case you too have never heard of it!
Follow the steps below to quickly convert JPGs to PSDs in Photoshop!
Step One
Start by making sure all of your layered PSD files are in a single folder. You will be selecting this folder in a later step, so make note of its location on your computer.
Step Two
Open Photoshop and navigate to File > Scripts > Image Processor
Step Three
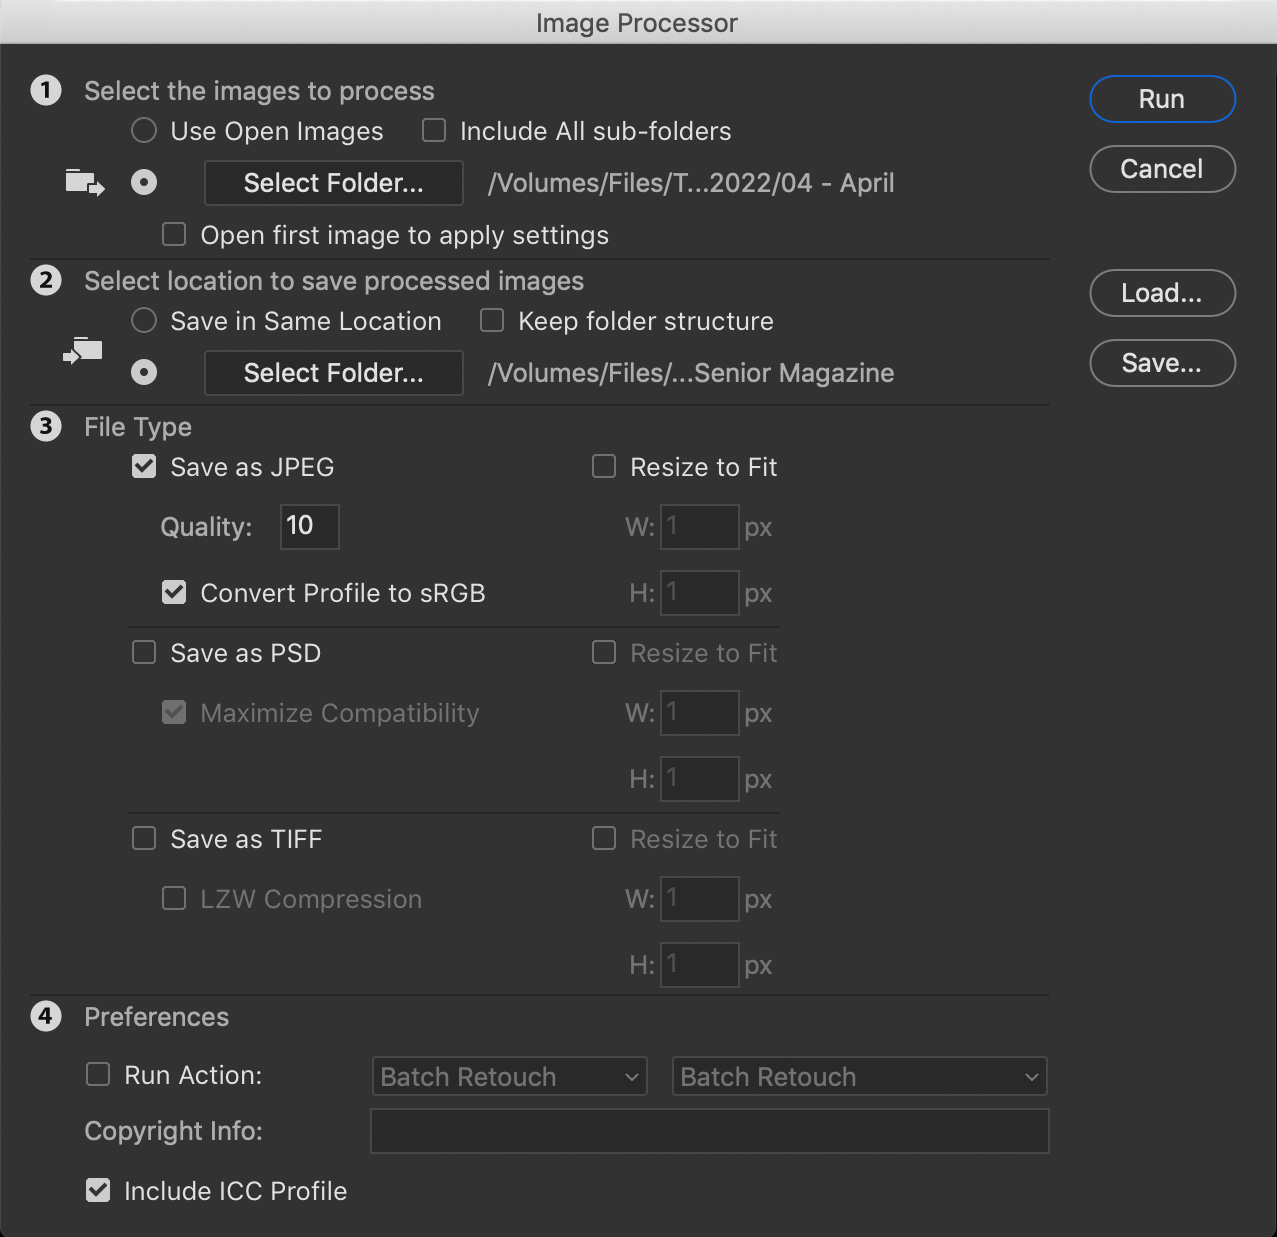
Once open, the image processor will look like the image below. There are a few options that need to be filled in before you can put it to work. We’ve listed them below.

SELECT SOURCE FOLDER // this is the folder which contains your PSD files.
SELECT DESTINATION FOLDER // this is the folder where you want your final JPEGs to save. Keep in mind, Photoshop will create a folder in this location titled JPEG and will save all the flattened files in this folder. If you want Photoshop to just create the JPEG folder in your source folder, just check the ‘Save in Same Location’ option.
SELECT FILE TYPE // Make sure you check the ‘Save as JPEG’ box and choose your desired quality. We usually do 10. We also like to check the “Convert Profile to sRGB” box so these files will display with the richest colors when uploaded to the web.
OPTIONAL // There are a few additional options within the Image Processor Menu. The Resize to Fit option can be used to resize your files for web. Just enter the desired max width and height in the boxed provided. You can also choose to run an action before the files are saved. This is great for web sharpening or to use an action that watermarks your images.
Step Four
Click Run! Sit back and watch your computer do all the work for you! Photoshop will open each PSD from the source folder and save the flattened JPEG file in the destination folder. We guarentee it will do it faster than you can do it manually!
Step Five
Check your work. All of your PSDs should have been saved as JPEGs in the destination folder. If they aren’t there, go back and double check your settings.
Are you an Adobe Bridge User?
Image Processor can also be run thru Bridge by selecting your desired files and navigating to Tools > Photoshop > Image Processor. The selected images will be used as the source. Set all other settings above as you would do in Photoshop.
Find this tutorial useful? Pin it to Pinterest:

fast solution
amazing
This is such a time saver. Thank you so much!